
How to Bring an Image Forward in Google Slides?
Google Slides uses a layering system where object is placed either in front of or behind another. If you change this order, you can easily bring an image forward and make it visible again.
In this guide, I will explain how to bring an image forward in Google Slides using simple methods.
I will also walk you through how you can prevent issues in future presentations.
Let us proceed!
Understanding Layer Order in Google Slides
What is Layer order?
Layer order controls which element appears on top and which stays behind. Google Slides does not show layers visually. Here, users will have to manage them manually.
- Knowing how to move an image forward saves time
- It prevents unnecessary deletion
- It prevents the re-uploading of images
Method 1: Bring an Image Forward Using Right Click
This is the most common and easiest method.
For this;
Step 1: Click on the image you want to move forward
Step 2: Right-click on the image
Step 3: Look for Order option
Method 2: Bring an Image Forward Using the Arrange Menu
For this;
Step 1: Select the image you want to move
Step 2: Click Arrange
Step 3: Select Bring to front/ Bring forward
What to Do If You Cannot Select the Image?
Sometimes selecting the image itself is difficult because there can be another object covering it.
In this case;
- Select the object on top
- Send the object backward
Now if the image is grouped with other elements, it cannot be moved.
For this;
- Right-click on the group
- Ungroup the image
- Adjust the image
Why Background Images Cannot Be Brought Forward?
Images that are set as slide backgrounds do not behave the same as other normal images. The content cannot be moved forward.
To control an image;
- Remove it from the background
- Insert it as a normal image
Common Mistakes That Cause Image Layering Problems
A few common mistakes include;
- Overcrowding the slides with elements that overlap eachother
- Copying content from other presentations
- Use of complex slide layouts
How to Avoid Image Layer Issues in Google Slides?
- Keep slide design simple
- Avoid placing too many elements on top of each other
- Use clear spacing between texts
- Use clear spacing between images
- Use consistent layouts across every slide
Editing Slides Faster by Managing Layers Properly
When you are facing layering issues, it usually slows down your slide editing process.
A lot of your time is wasted.
This is why it is important to understand how you can bring your images forward. Let us look into it!
Creating Better Slide Layouts From the Start
The main step is to start with a well-structured layout.
The images and texts are placed correctly from the very beginning.
This maintains consistency. This reduces your editing time.
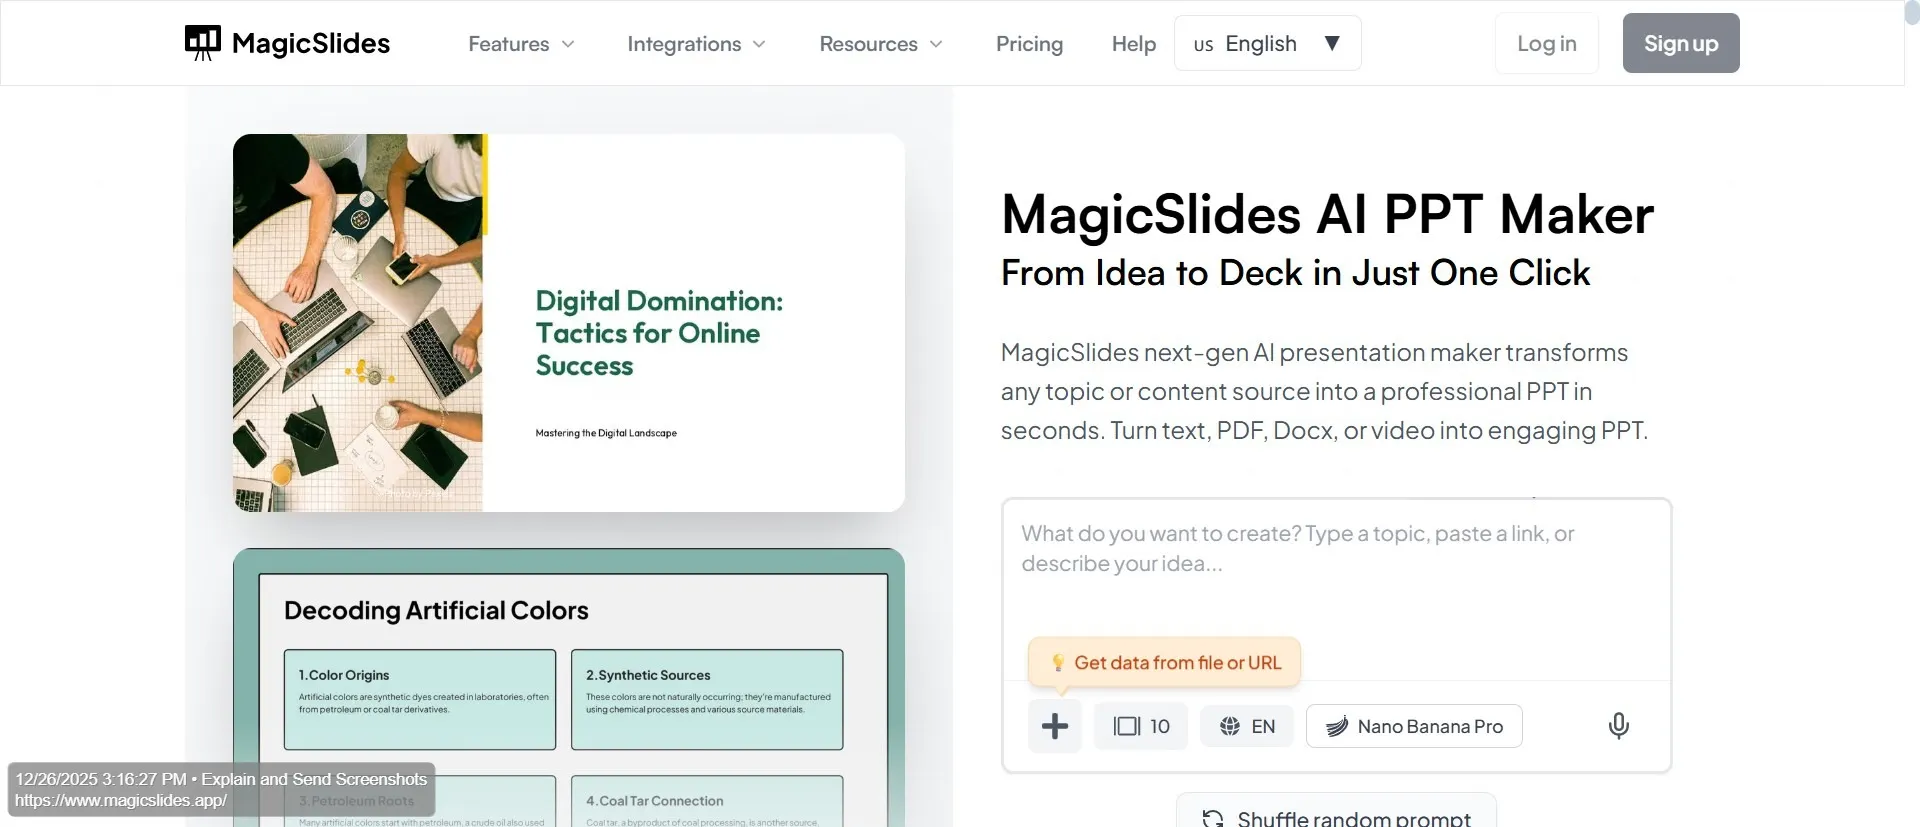
Creating Clean Slides With MagicSlides
Now, let us look into a tool that will help you make your entire process easier. MagicSlides.app helps reduce this problem by generating structured slides automatically!
Instead of placing images and text manually, MagicSlides, an AI-powered presentation maker tool, creates clean layouts where content is already positioned properly.
For users who frequently create presentations, starting with structured slides can save time. It can also reduce the commonly faced design issues.
Why Knowing This Feature Is Important?
Knowing how to bring an image forward might seem like a small detail. However, it saves you so much time, especially during editing.
This helps you fix visibility issues. It also helps you work without any interruptions in between.
Best Practices for Managing Images in Google Slides
- Use fewer overlapping elements
- Keep images and texts separated
- Avoid grouping elements
- Review slide layouts regularly
Also read: How to Save an Image from Google Slides in Seconds?
Conclusion
Bringing an image forward in Google Slides is an essential skill. Understanding how layering works helps avoid common issues.
MagicSlides can simplify slide creation by providing structured layouts from the very start. This reduces the need for any adjustments that are to be made manually.
FAQs
Q1. Why does my image disappear in Google Slides?
The image is usually hidden behind another element, such as text or a shape.
Q2. What is the difference between bring forward and bring to the front?
Bring forward moves the image one layer ahead, while bring to front places it above all elements.
Q3. Can MagicSlides help with image placement issues?
Yes. MagicSlides generates structured slides that reduce manual layout and image adjustments.
Q4. Can I bring multiple images forward at the same time?
Yes. You can select multiple images together and then use the bring forward or bring to front option to move them above other elements.
Q5. Why does my image move back after I adjust the text?
This can happen when text boxes are copied or resized. Google Slides may change the layer order automatically.
Q6. Does changing slide layouts affect image order?
Yes. Switching layouts can reset how elements are layered, which may place images behind text again.
Q7. Can I lock an image layer in Google Slides?
Google Slides does not currently offer a layer lock feature, so image order must be managed manually.
Q8. Will bringing images forward affect presentation performance?
No. Changing image order does not impact slide performance or loading speed.